How to avoid Compression made by Instagram for Pictures (An Ultimate Guide)
How to avoid compression made by Instagram for pictures? Just try to imagine this scenario in that you spent a lot of time and effort taking a stunning picture for your Instagram feed.
However, you encounter a difficulty when attempting to submit your picture assets to social media.
The content you’ve produced, gathered and organized with all your efforts at the end it looks awful.
The reason could be the resolution is off, the layout is all wrong, or your photographs are distorted or indistinct.
It will create a lot of mess, isn’t it?
And it’s very essential that you know how to upload high-quality photographs to Instagram, especially if you are a videographer or a photographer.
If you need your picture quality to be better, then, here’s how you can publish excellent quality images to Instagram and prevent losing hours of hard work without sacrificing priceless pixels.
Before we go on further, let’s discuss why does Instagram compress photos?
Why does Instagram compress photos?
There could be several reasons for doing this to address all of them is not possible, but we will try to illustrate and make you understand some of the reasons.
Below is the following reason for such activity done by Instagram:
- Instagram uses compressing featuring for picture posts to reduce the server load and maintain a seamless experience because there are millions of posts uploaded daily.
- The user experience is yet another justification for the compression done by Instagram. Some largepicture files of high resolution would take a long time to upload if there was no compression.
I hope you have got some basics about the process of Instagram compression pictures.
Now let’s get to the point where you will learn how to upload a picture so that the quality of the picture will not get compromised.
How to upload for better quality and resolution?
If you are suffering from the auto-compressing feature on Instagram and want to know tricks that can save you effort and can help you with uploading a better-quality picture, then you are in the right place.
In this section, we will see how to upload a picture so that the quality will not get compromised in steps.
Preparing your image:
Images that are distributed among teams via email or other channels frequently become compressed.
This implies that you can lower the image’s quality, and that’s even before you think about posting.
On the other hand, unless your photographer has previously resized them for social media, photographs taken with a DSLR camera will usually always be delivered in a high-resolution quality.
You must therefore reduce the size of your photographs in order to prevent Instagram from compressing them.
Understanding the requirements for the image by Instagram:
The three most common causes of incorrect image display are as follows:
- You have the wrong aspect ratio. Instagram will automatically crop your photo in this scenario, and you will lose the quality of your picture.
- When an image is larger than 1 MB, Instagram automatically reduces its size and its quality.
- Your image is either too small or has a low-resolution image.
Basically, the following is the best resolution you should be used for uploading your pictures:
A portrait photo should be 1080 by 1350 pixels.
On a mobile device, this will take up the majority of the screen, 1080 pixels by 1080 pixels for square photos, and for the horizontal or the landscape mode,
Then the longest edge must be of 1080 pixels, but Instagram does not recommend it because it is mostly used on mobile phone which have a vertical interface.
Editing your pictures:
Let’s say you’ve realized that your photographs’ size, shape, or format is incorrect.
You can start by first adjusting your picture to meet your desired requirements.
You may avoid the possibility that Instagram will resize your photographs for you and spoil how your lovely images are displayed by doing it yourself before uploading.
Unfortunately, if you don’t have any premium tools for editing your picture, you can use either Canva or adobe lightroom.
Remember that sharing your photographs online requires caution, even if you are utilizing Canva or Lightroom.
You still run the danger of image compression if you send your images to other people or even to yourself.
To share the photograph with others, post it to Google Drive.
You can then download it to your phone and upload the picture there, along with other members of your team.
Uploading your pictures via Instagram:
Even if your picture has already been supplied in the appropriate size and format, you might wish to make a few changes to achieve the highest possible level of quality.
You’ll have to perform this by hand if you don’t have a tool to do so.
Again, if you just need to make a few minor modifications, you may just use Instagram itself rather than Lightroom or Canva.
To modify your picture on Instagram, use these simple steps:
- Create a new post by clicking the “+” sign on the Instagram.
- Choose a picture you want to upload.
- Then press “next.”
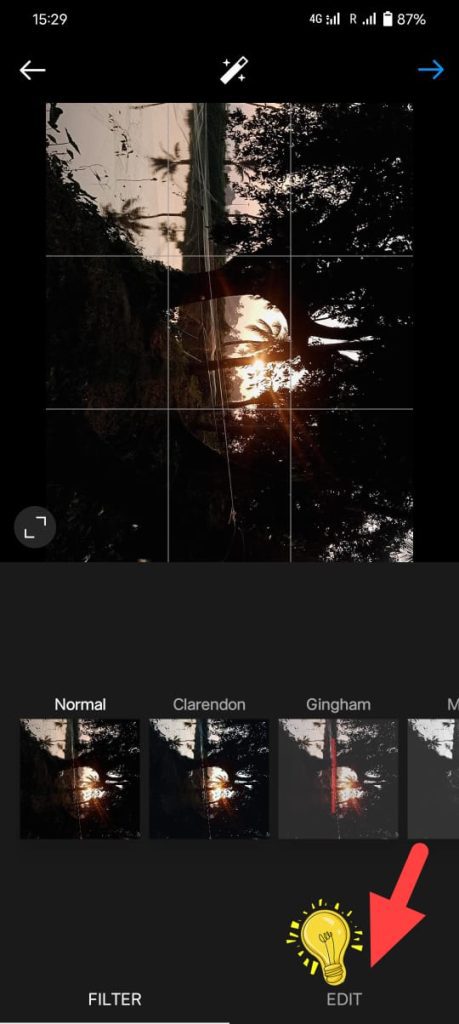
- Press the “edit option.”
- Choose the brightnessoption, then use the slider tool to increase it slowly. We advise do not to go above 30% on the bar but use your best judgment.
- Choose the “contrast” option, and ideally, boost it by slightly more than 10%.
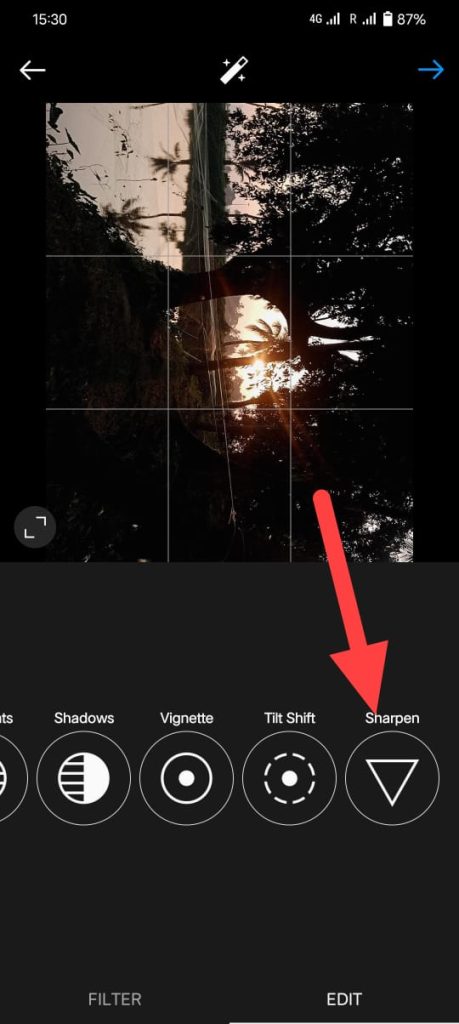
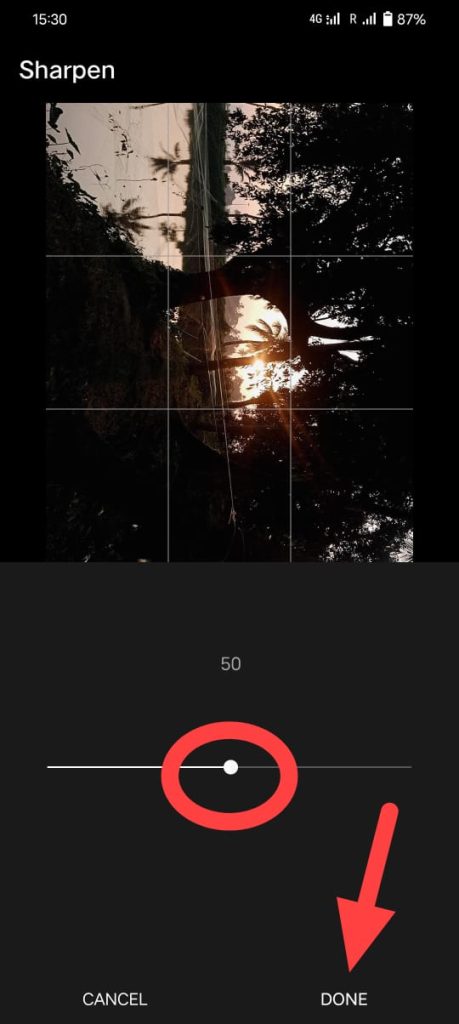
- Increase the sharpness or edginess of your image by moving the cursor over the “sharpen” function. This may make it seem higher resolution.
- Hit “next,” then “add a caption,” and then publish as usual.
Of course, Instagram edits won’t be as good as those made using other apps like lightroom or the Canva,
But if you’re trapped at a function and have to post something right away, they can still significantly enhance your posts and make the quality better.
You have to edit as you post on Instagram, which makes it challenging to edit continuously.
That makes it tough for you and your team to keep a consistent posting schedule because you can’t plan your posts in advance.
Conclusion:
Compression is still used by Instagram to limit the quality and size of photo uploads.
However, the good news is that as technology develops, the rules are loosening up.
Hopefully, Instagram will keep easing the rules to allow for larger and better-quality posts.
You can use above mentions hacks and tips to pass these compression steps made by Instagram to lower the quality of the picture to enhance their user’s experience.

